Mobius Website Creation/Hosting FAQ
Building and maintaining a Website can seem like a difficult task. However, with the right tools and someone to show you the ropes, you’ll find it’s not as difficult as you might think it is. This FAQ will answer some basic questions about how to get started after purchasing a domain name/Web space from Mobius Communications Co. and what you need to make the most of your Website. We’ll start by identifying some necessary information about your Web space from Mobius. If it helps you, please print out this how-to and fill in the information below for reference purposes. This will help you throughout the How-To.
Domain Name: _____________________________ (i.e. www.somename.com www.bbc.net/~somename)
FTP Username: _____________________________
FTP Password: _____________________________
HTML Editor/Application: _________________________ (i.e. FrontPage, DreamWeaver, etc…)
Okay, now that we have that out of the way, let’s start by downloading an FTP client so we can put our Website up on the World Wide Web. This How-To assumes that you have already created a Website on your local computer’s hard drive.
Step 1: Download and
Install FTP Client
To access the Web space from Mobius’s servers, you need an FTP (File Transfer Protocol) client to connect and communicate with Mobius’s FTP server. This allows you to transfer data in the form of images, HTML, and even Word documents to our server from your desktop. We’ll begin by downloading a 30-day trial of WS-FTP. If you would like to use this FTP client after 30 days, you’ll have to purchase it. To download WS FTP, go to IPSwitch and fill out the necessary information. After clicking “submit,” you should see a page with a list of download links, pick one, preferably an FTP in the United Stats, and click it. You will want to “save” the file to a location such as your desktop for easy access. Let the file download complete.
Okay, now we have downloaded our FTP client and are ready to install it. Find the executable that you just downloaded and double-click the file. This will launch a setup program that installs the FTP client onto your computer. Complete this installation process and you should arrive at a screen asking you whether to continue the evaluation, say “start evaluation” and the program will launch.
Step 2: Set Up the
FTP Client
Now that we have downloaded and installed the FTP client, we need to tell the FTP client how to communicate with our server by providing it such information as a domain name, username, password, and home directory. At the box that appears after initializing WSFTP for the first time, click the “create site” button at the right. In the name box, type the name to help your remember your Website, such as “Mobius Web.” Then, click “next.” Now things start getting interesting. At the host address box, type the domain name or your Website or www.bbc.net if your Website is located at www.bbc.net/~yournamehere . For example, we’ll type www.mobiusinternet.com. Click “next.” Now, input your FTP username and password into the boxes on this screen. Just leave the “account” box empty for now. Click next. At the next screen, leave everything as default and click “next.” At the next box, click the “next” button. Now, you can simply click “finish” at the page about the firewall—you don’t need to worry about that for now.
Alright, we’ve setup a way for the FTP client to connect to the FTP server and should be ready to go. Just click “Connect” at the box you are currently at and, if all goes well, you should see folders in the right pane of WSFTP, indicating that you have connected to our FTP server. Okay, now we are ready to roll and upload some Web pages.
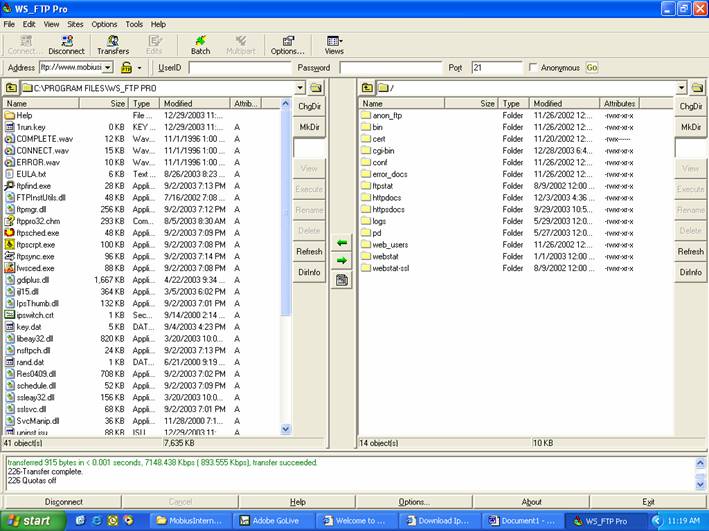
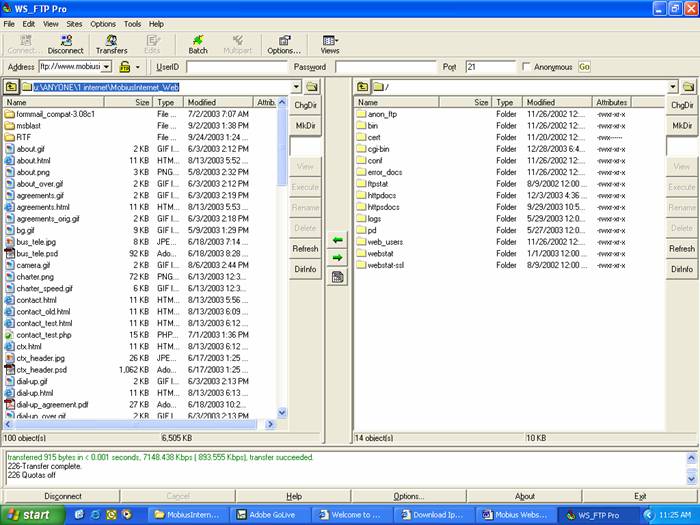
IF all went well, you should be setting at a screen such as this. Now, we need to use the left pane to move to the local folder on your computer that contains the files that make up your Website. To do this, navigate to the folder where your Website is by doubling clicking in the left pane. When you get to your files, you are ready to upload them. The screen before upload should look something like this:
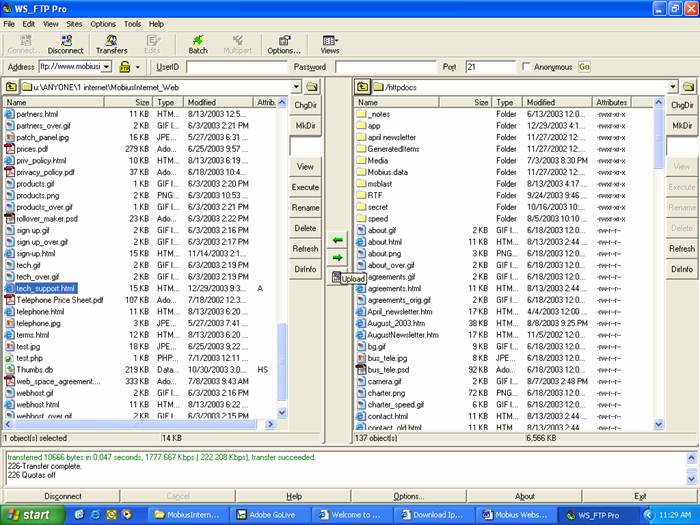
Alright, now we need to select the file or files we need to upload and “copy” them to the remote server. This can be done by clicking the green arrow pointing to the right (toward the FTP server pane) with the files to be uploaded highlighted in the left window pane. Before we do that, we need to change the directory of the FTP server to “httpdocs”—the default directory for your Website if you have purchased a full domain name from Mobius (such as www.yournamehere.com). If you have a www.bbc.net/~yournamehere domain, you are not required to change to the “httpdocs” directory. If you need to change the directory, this can be done by double clicking “httpdocs” in the right pane. Below is a sample of what it might look like after double-clicking “httpdocs.”:
Now, if we have the file(s) selected in the left pane that we want to upload, and are working in the directory we want to upload to on the FTP server in the right pane, we are ready to click the green “upload” arrow. When you do this, a progress box will emerge informing you of the upload status.
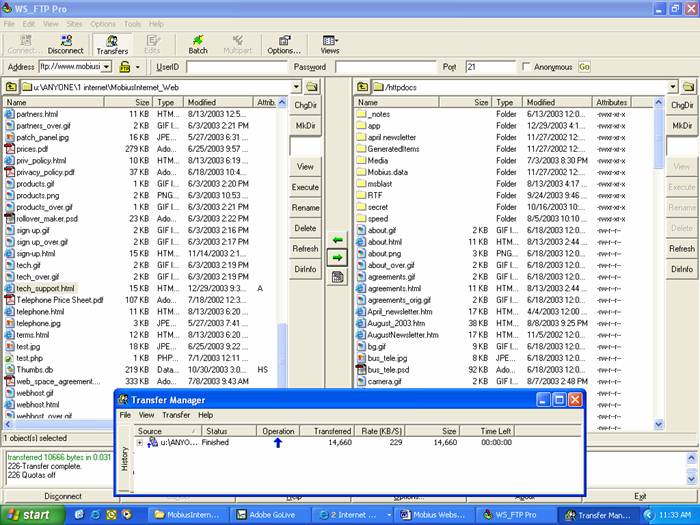
The status box will go away when the download has successfully completed. Be patient, it may take some time to upload a large file or a large number of files. However, as long as progress is being made, the upload is working.
Step 3: View Your
Website
Now that you have mastered the use of the WSFTP FTP client, you should go to your website by typing into a browser your domain name. If the upload was successful, your Web site should appear when you type in your domain name. If it does, good job, you’re done with the upload. Now check all the links and make sure they work. If there are errors, be sure to fix them and re-upload the changed files using the same process above. If you don’t see your Website, the upload did not work correctly. Make sure that you are working in the correct working directory of the remote FTP server and that you username, password, and domain name are correct. If all else fails, you can call tech support at 487-5500.
Website Creation
Hints:
Now, I will share some trade secrets with you to make your Web development project easier and more enjoyable.
- Avoid unnecessary clutter in your Web site. Keep files and folder organized and plan the development of your Website before you start.
- Make your Website look and feel completely the way you want it on your local computer before you upload any files. Uploading files early makes things confusing.
- Don’t be afraid to try new things and experiment. With today’s software, hardware, and computers, it’s difficult to destroy something you need.
- Avoid frustration, if something doesn’t work and you can’t figure it out, go do something else for a while and come back after clearing your head and try to pick up where you left off.